|
Over the course of this semester, I was able to explore an interest that I have been drawn to for the longest time but never dived into: photo editing. I researched different editing software and settled on Corel PaintShop Pro 2021 Ultimate. It is a one time purchase program and doesn’t require a yearly subscription renewal like other software. The only unfortunate thing about choosing Corel PaintShop is that there isn’t a wide array of resources to use other than tutorials or articles from their website or videos from various users on YouTube. Week 1 I began my learning journey using a picture of my chill self (lazy weekend wear) and played around with a few photo enhancing settings, blemish removal, and vignette. Nothing too fancy, I just wanted to ease my way into my learning project. Resources: Week 2 Color splash photos have always been super visually appealing to me and so learning how to do that was definitely on my list of things I wanted to try! I used 3 different photos which all required using different methods to achieve the color splash result. Because of its jagged edges, the pink weed photo required using the magic wand selection tool to isolate the area I wanted colored. And since there was more than one area that I wanted colored in the photo of my mom, my sister, and I, I had to add layers then erase from one layer in order for the main picture to display the areas I wanted to create the desired effect. I used this same technique to create the color splash of the bee as I wanted it to bee (play on words!) vibrant. I loved learning how to create this effect! Resources: Week 3 We were to download and assess an app. I used PicsArt and wasn’t a huge fan of how it was set-up. I liked the features it offered but took too many steps to go in and out of each editing element that it deterred me from wanting to use this app in the future. The PicsArt website offers some neat templates and I might access that in the future but the app, not so much. I still wanted to create something with it and used my favorite tree in our city park. I used color exposure and a patterned brush tool. Resources: Week 4 I wanted to learn how to remove objects. There were a few photos I had in mind. So I removed text from one and a person from another. Resources: Week 5 This week was by favorite! I really should’ve saved this until the last week as I wanted to present progressively cool things but instead I did this second last and ended very anti-climatically. Oh well. This photo isn’t particularly “fake-news” quality but I still really like this picture and really enjoyed creating it! There’s a lot of steps involved with this photo so check out my original post if you’re interested in the process. Resources: Week 6 This was probably my least favorite week and felt that since my masking photo was a relatively boring result that I needed to compensate by presenting two techniques. So I gave a shot at adding a mask and doing a mirror/reflection effect. Resources: Overall, I really enjoyed this learning project and look forward to continuing working with different techniques and hopefully exploring video editing next!
0 Comments
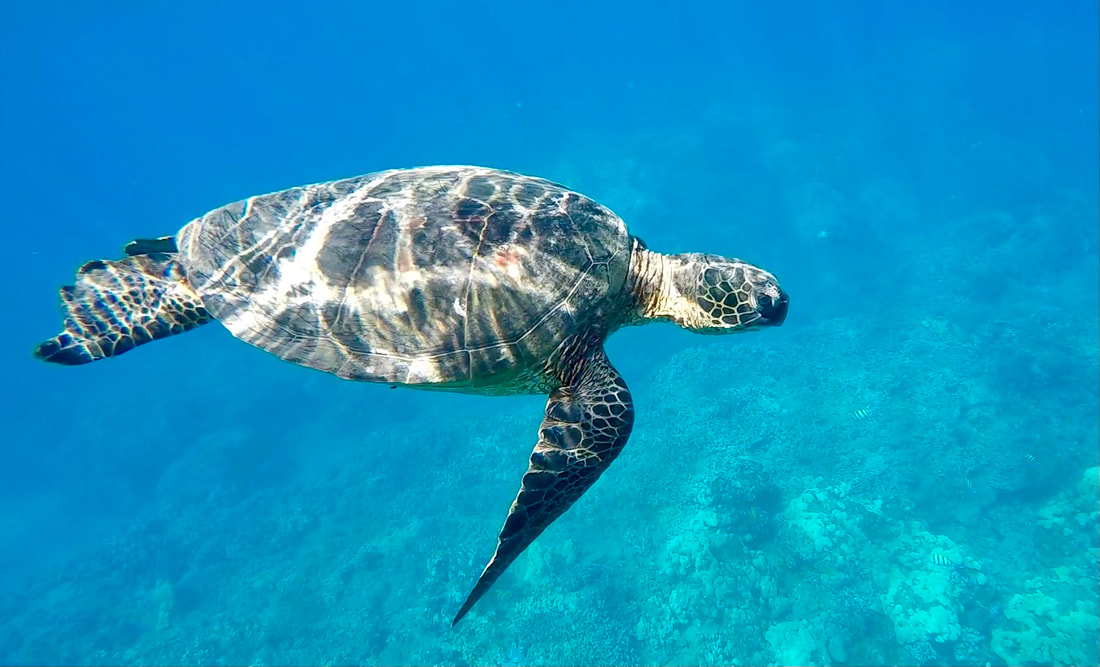
So my last photo editing task I wanted to try out was applying a mask. Well, it turned out to be A LOT LESS exciting than I had anticipated. However, I do want to try the blending mask technique found on the tutorial but I just couldn’t find the right picture. So here’s my feeble attempt. I still like what the picture, how could I not, it’s my doggie!!! 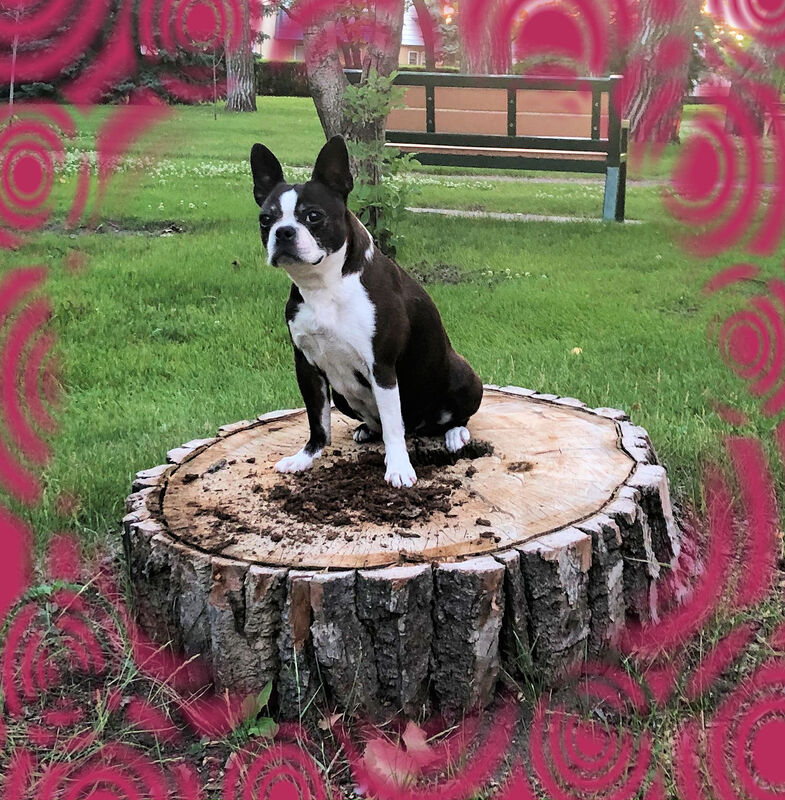 ReflectionBecause I wasn’t satisfied with the mask picture, I also attempted to create a reflection/mirror effect. Still not up to my standards but again, I still like it. 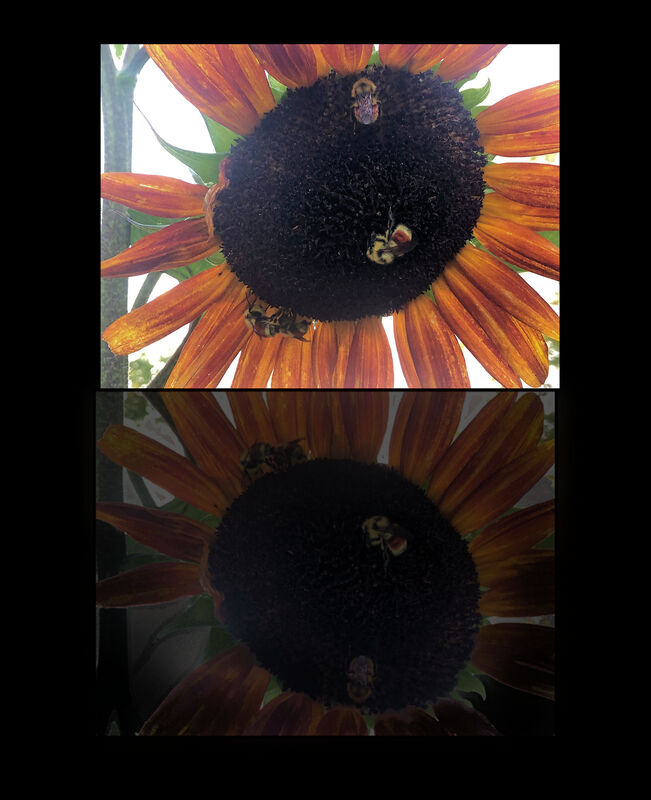 I wanted to give blending 2 photos into 1 a try. First I had to locate 2 photos. I found one from my Facebook page of my sister's dog Taurus, a now 14 year old English Staffordshire Bull Terrier, and the other of a turtle she photographed while snorkeling in Maui.
Next, I watched Part 1 of 6: An Introduction to Layers and followed that by watching all 6 parts. They were only a few minutes each so I figured, why not? I found Part 6 of 6: How to Use Layers to Create Dynamic Photos particularly helpful for changing the color of Taurus. But I still had questions, so the search continued. I found Blending Two Images - Tutorial - PaintShop Pro which discussed techniques a little beyond my current skill set but I still learned more about layers and how they are used for creating desired images. Then, I needed to know how to copy, paste, and remove the background of the Taurus photo to blend him into the turtle photo, so I watched Corel Paintshop Pro Selecting and pasting yourself. My process included copying the turtle photo, pasting onto the Taurus photo to colorize him, selecting Taurus, removing the background, then copying him to put into the turtle photo. Next, I flipped and rotated him, placed him, used the blending tool to remove the flat edge, cropped the picture, and used the cloning tool to fill in a missing corner and the missing part of his paw (from the sunlight), adjusted his coloring some more (though it's still not quite what I wanted), AND VOILÀ! Sorry about droning on about the deets, I mostly wrote it to help myself remember for future projects! 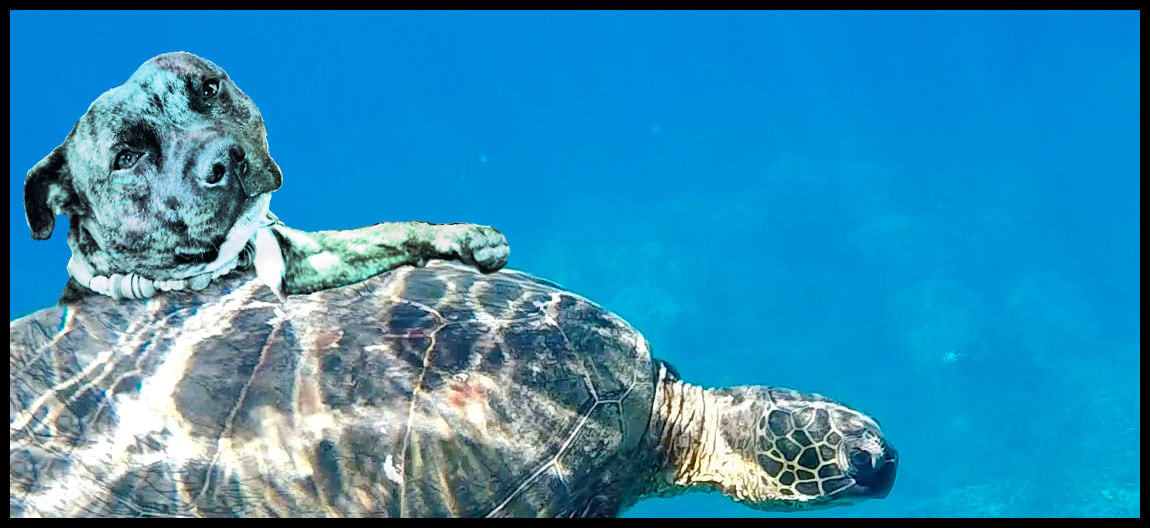 I wanted to try removing objects from a photo. I found this TikTik video from @photoshop, even though it's not the PaintShop Pro Ultimate, it still inspired this week's photo editing task. I accessed PaintShop Pro How To Remove Objects From Photo to learn how to specifically do this in PaintShop. I found this picture as I was looking for a header photo for my health subject page. Many images with the description “mind body soul flower” only have 3 stones, so I thought this picture was perfect as I wanted to include the emotional aspect of well being as well.  As the Indigenous Medicine Wheel has four core aspects of wellbeing: Mental (Mind), Physical (Body), Emotional (Heart). And Spiritual (Soul). There are many medicine wheels but I liked how this one aligned with the words on the above picture (e.g. the physical quadrant can also be represented by the word "body", and so on).  Removal of TextI could not, for the life of me, find a matching font. I even tried font identifier websites such as WhattheFont! and Font Squirrel, but no luck! And they wanted you to purchase fonts - WTF(ont) is right!!!! So, I had to remove the writing annnnnnd search for a new font... The ResultWriting removed, font chosen, writing rearranged. And, of course, I had to play around to make it more my creation!  Another ExampleI removed the person in the background on the right
I thought the features advertised for the PicsArt app looked like I could do some pretty neat things with this photo of my favorite tree in Crescent Park. 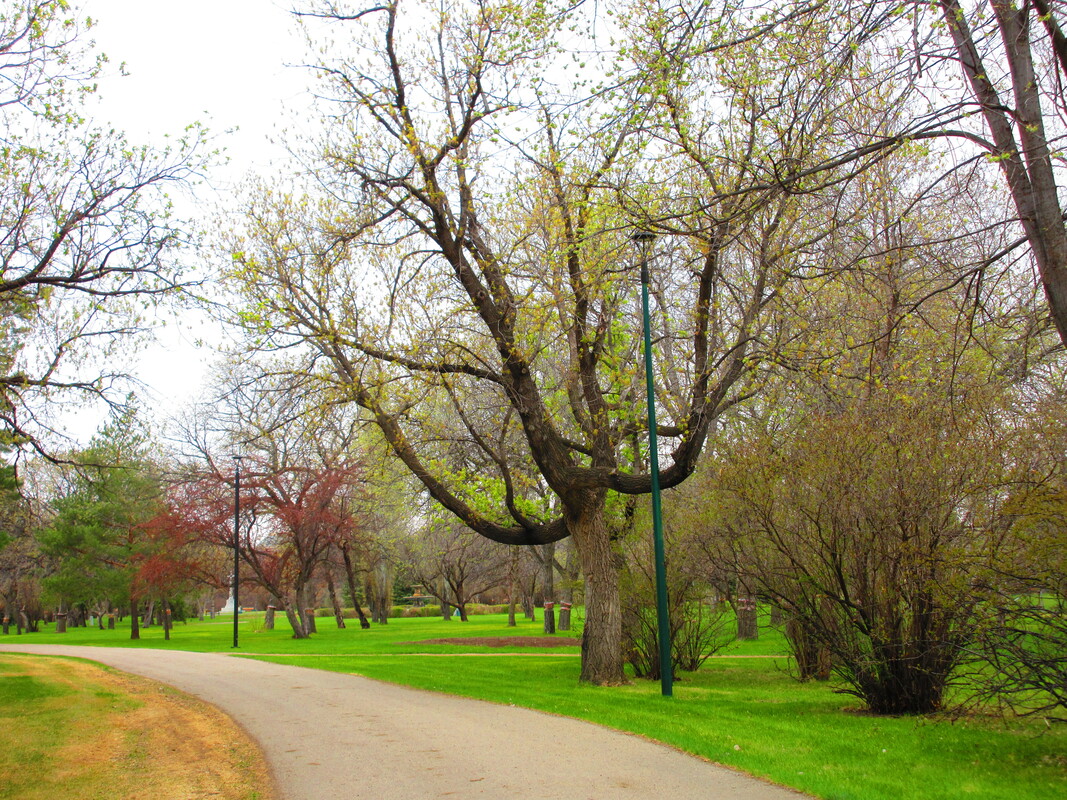 However, upon downloading and tinkering around within the app, I found it to be tedious and basically annoying. This app has several flaws! 1. Instead of having all the features accessible while working on one photo, editable options are broken down into categories that you have to navigate in and out of. If you're an amateur photo editor and unfamiliar with what each feature entails, the time and steps it takes becomes increasingly exhaustive.  2. It takes 5 STEPS to select your desired photo AFTER choosing a category.  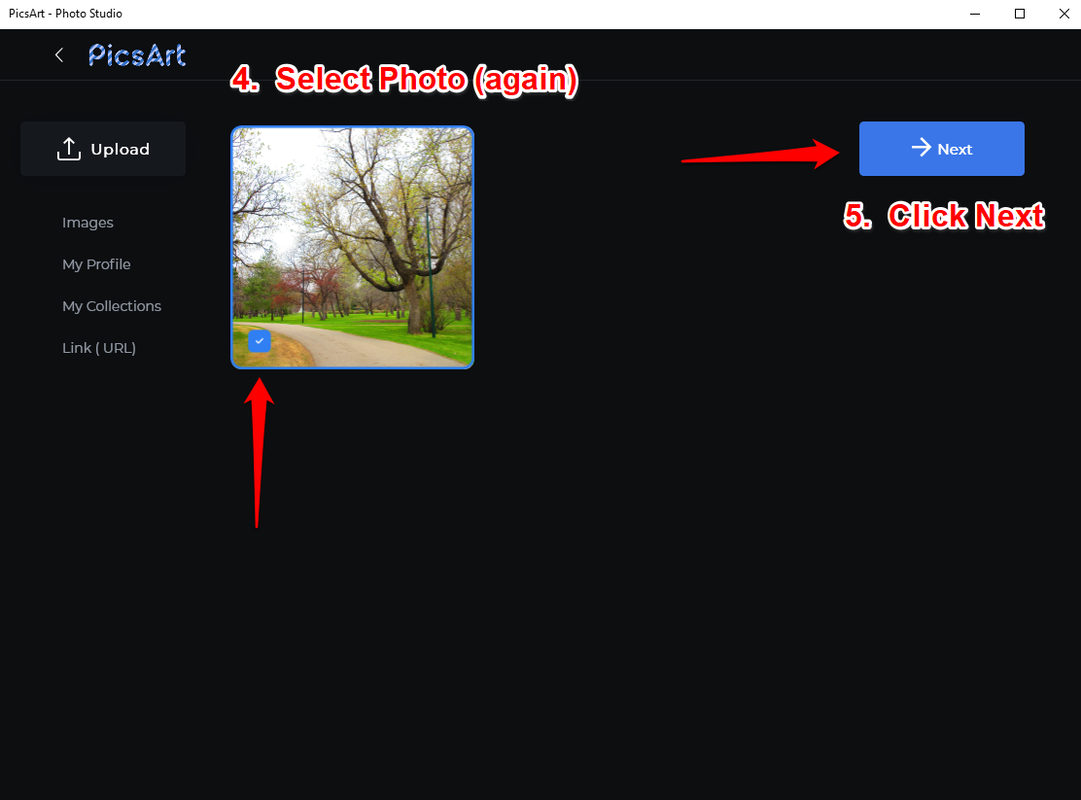 3. Once you’re satisfied with the results in that category, you have to Share your photo, publicly or to your private collection, before you Close (even if you are just going to a different editing category). If you want to play around with the any of the other features, you have to reopen and close your photo every time! Even if it’s the same photo!  4. If you don't Share your photo, you LOSE ALL your work! Don’t get me wrong, I like the features offered in PicsArt, but the lack of ease to switch from feature to feature makes it a chore. Among my dissatisfaction, I still wanted to create something. Using Color Exposure to create the double image, I saved it to my private profile then used the Editor for basic photo enhancement and to pattern the walking path and Voilà! 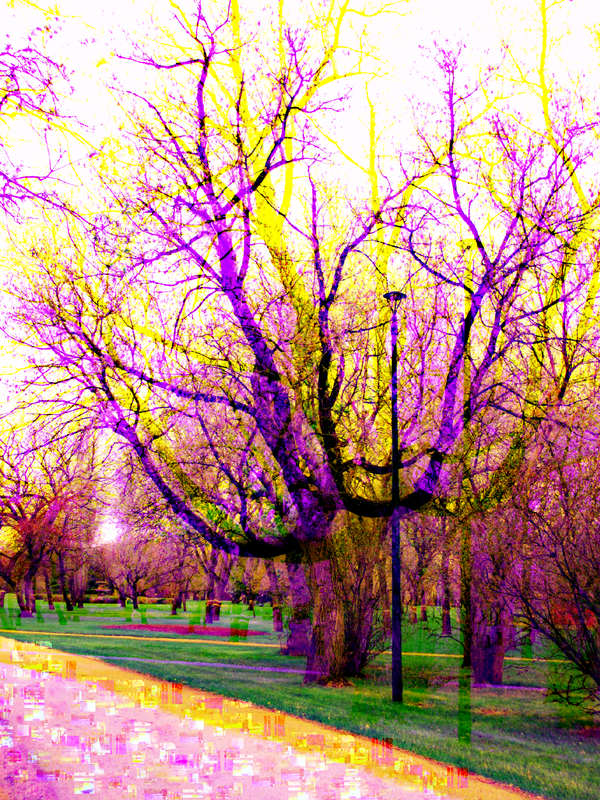 I have always loved photos where one color was highlighted over a black and white background and wanted to learn how to do this myself! So first I tried the PaintShop Pro Tutorial How To Add Color Splash. Using the Magic Wand Selection Tool is typically a good option if the desired object is ONE shade and (as far as my limited knowledge goes) only one section can be selected at a time. For example, with the pink weed picture, there are several different shades of pink and several different colors within the weed stems and blooms, but I wanted to highlight the weed as a whole. So I decided to utilize the Smart Edge Selection Tool. This allowed me to make connected line segments all around the edges of the object and each segment created an edging that reflected the angles or spikes of the edges I wished to include. Now, of course it’s not perfect and I had to make lines that jutted in and out of the spikey blooms to ensure they were selected but I think it turned out fairly well. 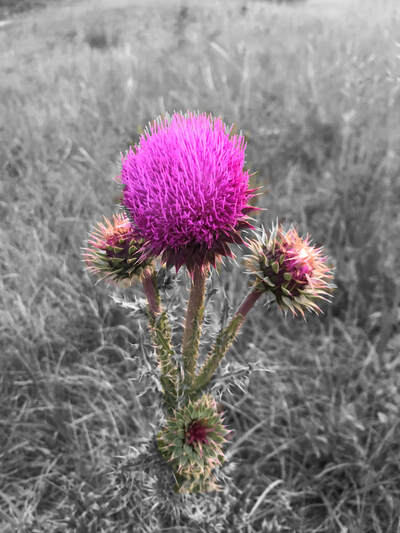 Whereas, for the picture of my sister, my mom (in the background) and myself at a Roughriders Football Game, I wanted to emphasize the green but this meant figuring out how to select more than one area. So YouTube was my next destination. Once I found the Color over Black & White, ColorSplash by VscorpianC video (and made sure I could recreate the steps 🤞), I was set! I won’t bore you with the details but it included creating layers and then using the Paint Brush tool to reveal the original photo layer. Through this process, I also learned that if you repeatedly go over the colored area, it becomes more and more vibrant.  And here’s a bee using the same technique as above, just for fun - and because bees matter! or is this a wasp 😳?😳 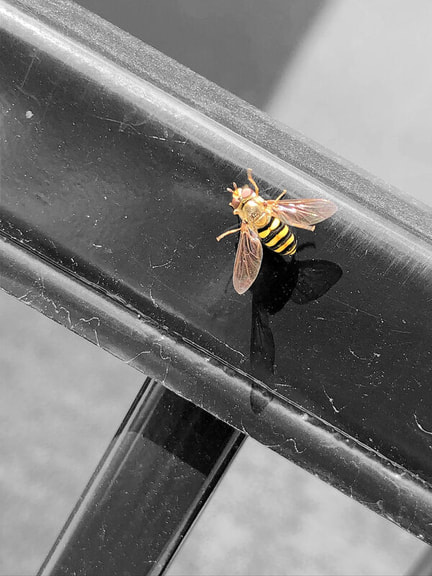 I’ve decided to explore photo and video (if I get brave enough) editing. I purchased Corel PaintShop Pro 2021 Ultimate (this is a hobby I have wanted to explore for a long time so thought this would be the perfect opportunity to dive in and motivate me to continue even after this class). I chose a photo of me that I desired to beautify 😝 WEEK 1First, I watched the Let's Get Started PaintShop Pro tutorial video. Next, I removed some blemishes, reduced the appearance of some wrinkles, and applied a general picture enhancement. Then, I deepened the contrast, removed the white from the sock by using the color selector tool to select my leg color and filled the white areas with the color. Last, I added a freestyle vignette.
|
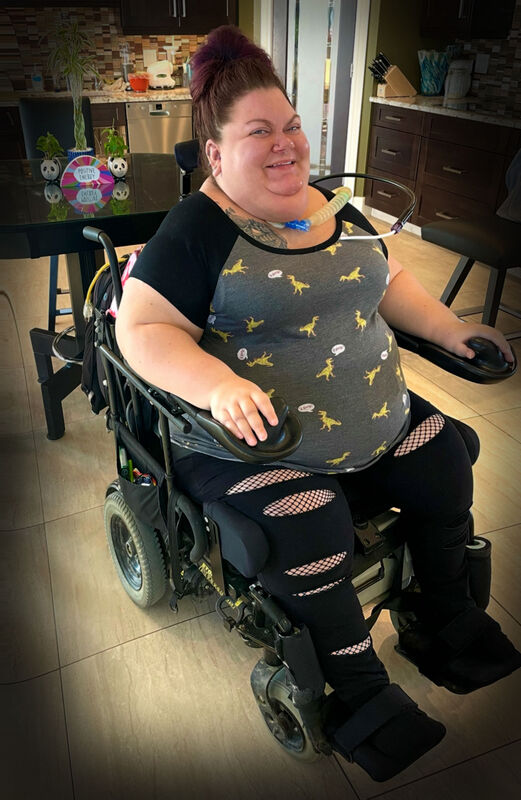
AuthorJenn New - an outgoing, Moose Jawvian, who loves nature, is a cooking competition show addict, in her last class of her Education Degree, and just happens to be a C1-C2 ventilator dependent quadriplegic. 
|


 RSS Feed
Photo used under Creative Commons from A.A.Bindawood
